Technology in the early 21st century is here to kill us. It stresses us out and shortens our lives and makes us feel like failed Neanderthals every single day of our lives.

We are drowning in data yet no one controls theirs at all. At best it happens to be properly backed up at someone else’s cloud location for a short period of time before that fails or the company goes bankrupt or inevitably tries to extort money from you.

The solution to taking control of your own data must involve massive local redundant backed-up storage (MALREBS). There is no other alternative. And this is a technically impossible task for 99.99% of the human race. In this day and age, everything precious to you is stored either by someone else who really doesn’t give a shit about your data, on ridiculously flaky steel platters that randomly fail while you are sleeping, or solid state drives that wear out from the second you start using them. But here we are so let’s struggle on to get it done.

One required component of MALREBS is raid. This turns those flaky hard drives from 100% chance of total failure to perhaps something less than 90%. This is very very important.

There is only one raid solution to rely on. Linux software raid is the only solution that is both free (in all senses) and reliable, in that you can take your hard drive data with you from a very old (possibly non-existent) system to a brand new system and have a reasonable expectation that the data will still be accessible.

But here’s the rub: mdraid has not received the polish it needs to Just Work. It has serious flaws that after hours of learning, still leave you unsure and hanging and most likely bailing out of the entire process. But it is the best thing we have on the planet, so let’s distill it down to the essentials.

  1. check S.M.A.R.T. data of drives – run tests and make sure they are completely healthy!
  2. clean raid drives of superblock and partition data
    mdadm --misc --zero-superblock /dev/sdd && dd if=/dev/zero of=/dev/sdd bs=1M count=100 && mdadm --examine /dev/sdd
     mdadm: No md superblock detected on /dev/sdd.
  3. use whole drives (not drive partitions) in a newly created raid
    mdadm --create --verbose /dev/md0 --level=mirror --raid-devices=2 /dev/sdd /dev/sde
     mdadm: size set to 3906887488K
     mdadm: automatically enabling write-intent bitmap on large array
     Continue creating array? yes
     mdadm: Defaulting to version 1.2 metadata
     mdadm: array /dev/md0 started.
    watch -n 1 cat /proc/mdstat
    # wait 400 FUCKING MINUTES for a GODDAMNED EMPTY 4TB DRIVE to sync with ANOTHER empty 4TB drive, FUCKSAKE
    # IF YOU REBOOT BEFORE THAT, IT WILL BE AS IF YOU NEVER SET UP A RAID
  4. save and reboot and make sure the mdraid service restores the raid
    mdadm --detail --scan >>/etc/mdadm.conf
     rc-update add mdraid boot
     # start then stop then start the /etc/init.d/mdraid service, make sure this works to restore your raid (check /proc/mdstat)
     # format /dev/md0 as ext4 and set up an auto mount point in /etc/fstab
     # reboot and pray
  5. hopefully much later, upon failure, to restore a single drive, set it up as a raid:
    madadm -A /dev/sdd # I THINK! it's all very iffy. Which SUCKS.

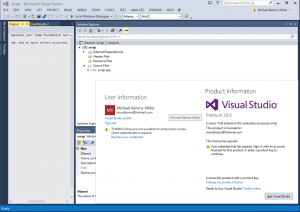
VISUAL_STUDIO_R.I.P._1989-2014

Visual Studio started CLOSING on me as I was editing due to my apparent change in status at some far-flung location for which I have no control. If Microsoft thinks that’s a feature I want in my primary development tool… well, all I have to say is, never again will I rely on it. Eclipse is a decent IDE and I’ll be converting my muscle memory to its ways after a couple decades of baking Visual Studio into my hands. It may be painful but it is also long overdue.

  1. Install Eclipse
    1. I went for the PHP version (“PDT”) since it seemed to have a few bells and whistles (eg git)
    2. The C++ support in Eclipse is called “CDT” and  you can install it by adding this “Work with” repo: http://download.eclipse.org/tools/cdt/releases/kepler
    3. I installed “CDT Main Features”, plus optional Memory View Enhancements, Misc Utils, Multicore Visualizer, Qt support, (ironically) Visual C++ support, and Visualizer Framework.  Not sure about these, time will tell.
  2. Configure Eclipse
    1. The biggest startup challenge is setting up key shortcuts.  The default ones are pretty stupid if you’ve used Microsoft products.  The main thing to remember is that you have to search for existing shortcut keys and manually remove them before you can add a new one, otherwise you will just get conflicts and nothing will work.  This sucks shit but not too bad once you realize what is going on.
    2. Set UTF-8 encoding:
      Windows > Preferences > General > Content Types, set UTF-8 as the default encoding for all content types.
      Windows > Preferences > General > Workspace, set "Text file encoding" to "Other : UTF-8".
  3. Set up projects
    1. Open C++ perspective
    2. Right-click project pane, New…, Blank Makefile, Other toolchain, use existing codebase location for workspace
    3. Search…, Working set, Choose, New, Resource, Name = codebase, click on existing codebase location, OK

More to come as I work with it. I’m moving the notes to the wiki.

Vote in the comments!

I really like the “fast” C++11 types, that give best performance for a guaranteed minimum bit width. Use them when you know a variable will not exceed the maximum value of that bit width, but does not have to be a precise bit width in memory or elsewhere.

Pick specific-width fields whenever data is shared with other processes and components and you want a guarantee of its bit width.

And when using pointer size and array indices you should use types defined for those specific situations.

FAST types:


    int_fast8_t
    int_fast16_t                fastest signed integer type with width of
    int_fast32_t                at least 8, 16, 32 and 64 bits respectively
    int_fast64_t

    uint_fast8_t
    uint_fast16_t               fastest unsigned integer type with width of
    uint_fast32_t               at least 8, 16, 32 and 64 bits respectively
    uint_fast64_t

SMALL types:


    int_least8_t
    int_least16_t               smallest signed integer type with width of
    int_least32_t               at least 8, 16, 32 and 64 bits respectively
    int_least64_t

    uint_least8_t
    uint_least16_t		smallest unsigned integer type with width of
    uint_least32_t		at least 8, 16, 32 and 64 bits respectively
    uint_least64_t

EXACT types:


    int8_t                      signed integer type with width of
    int16_t                     exactly 8, 16, 32 and 64 bits respectively
    int32_t                     with no padding bits and using 2's complement for negative values
    int64_t                     (provided only if the implementation directly supports the type)

    uint8_t                     unsigned integer type with width of
    uint16_t                    exactly 8, 16, 32 and 64 bits respectively
    uint32_t                    (provided only if the implementation directly supports the type)
    uint64_t

SPECIFIC-USE types:


    intptr_t                    integer type capable of holding a pointer
    uintptr_t                   unsigned integer type capable of holding a pointer 
    size_t                      unsigned integer type capable of holding an array index (same size as uintptr_t)

Pretty much SAY BYE BYE TO [int]! 🙂 …or when going across OSes and 32/64bit platforms you will be playing with this matrix of fun (originally from here):

image2

I’m a cross-platform developer, with about 17 different development environments. Most projects have a remote central team repository. git lets me cast my code out to all my local locations and effortlessly remained synced with the team repo. In addition, I can work exclusively in my local repos, as long as I need to, without touching the team repo until I’m ready to push my stuff to it. I’ve refined my process down to just the right number of branches to accomplish this. Here’s my git bliss:

First, set up a local centralized repo:

ssh me@my-central-repo-server
git clone ssh://me@the-team-repo/big-project
cd big-project
git branch daily_grind # create working branch but do NOT check it out

Next, set up a [git merge-to] command (huge THANKS to this gist):

emacs .git/config
  [alias]
    merge-to = "!gitmergeto() { export tmp_branch=`git branch | grep '* ' | tr -d '* '` && git checkout $1 && git merge $tmp_branch && git checkout $tmp_branch; unset tmp_branch; }; gitmergeto"

Now we can set up a clone in many new locations – repeat this on each dev box:

ssh me@my-laptop
git clone ssh://me@my-central-repo-server/big-project
cd big-project
git checkout -b daily_grind origin/daily_grind

This location is now a work site. Work in the daily_grind branch. Always pull before you get started working, and push when done:

ssh me@my-laptop
git pull
# work work work!
git commit -a
git push

When you are ready to share with the team, all your commits from all your dev locations will be in your central repo, in the daily_grind branch. Just merge your work with the team’s:

ssh me@my-central-repo-server
git pull # to get the team's latest
git merge daily_grind # to merge in your latest
# resolve any conflicts
git push # to push your changes to the team
git merge-to daily_grind # to push team changes to your work repo

If there were any team changes, you’ll get them in your local repos the next time you pull.

And away we go.